
Monday, February 7, 2011

Phase VIII - Install a Customer Headliner and Repainting the Hardtop

So the past couple of weeks we’ve made some really good progress on coming close to getting our Jeep on the road. We’ve repainted the Hardtop and Carpet Lined the inside to get rid of the factory white interior roof.

Here’s what the inside of a Jeep Hardtop looks like.  It’s plain, white & boring looking. Just about every Jeep out there with a Hardtop looks like this and when we’re finished carpeting this, you’d wonder why Jeep didn’t offer this as a standard option. Especially with the ever so popular Jeep JK’s now.

To do this we took the rear glass off, removed any hinges and interior lighting to make the job easier. Then flipped it upside down on some moving blankets to not scratch it up.
The style of headliner we’re using is called Foss Lining in Charcoal color. It’s a material that is marine grade that doesn’t collect water and create mildew. In our industry its widely used in the Leer Canopy’s to cut down moisture. So this is really going to help in regards to fogging of windows, help with insulation and also cut down on interior noise.

If you’ve never done upholstery work of any sort, leave this job to the Cap-it guys. It takes a lot of experience to make this job look like it was done at the factory.
First we mask off all the area’s we don’t want to have glue sprayed on, then we start from the middle and work our way out. The glue we’re using is moisture resistant and will ensure that the liner stays up for many years.


Then carefully wrap it up the side and contour it to the groves in the fiberglass.

Once both sides are done, I then go with a new blade and carefully trim off the access material.

Then we start re-installing all the hardware/wiring plugs and the window rubber.


Here’s the finished look on our Hardtop Interior. As you can see this really cleans up the inside.


To make this job look like a million bucks you have to take your time and be patient. For having over 15 years of experience, this job took me around 4 hours from prep work to reinstalling the hardware. Call your local Cap-it Store to get a quote on getting your Hardtop carpeted, as this adds a great look and cleans up the interior to a factory finish.


Now for the repainting the exterior.


The top has a textured finish that I wanted to keep sanding it down is out of the question. So I gave it a very good wash and towel dried it to make sure I removed all the dirt and grime. I then turned up the heat in the shop to get the hard top nice and warm. As for prepping, the only thing to do is to mask off the windows and door openings for over spray not to ruin the carpet.

I used about 2½ cans of Duplicolor semi gloss black and gave it about 4 coats of paint. I was a little surprised how much the hardtop absorb the paint.


Now that the Hardtop is looking like brand new, its time to put it back on the Jeep and take it outside and have a look.
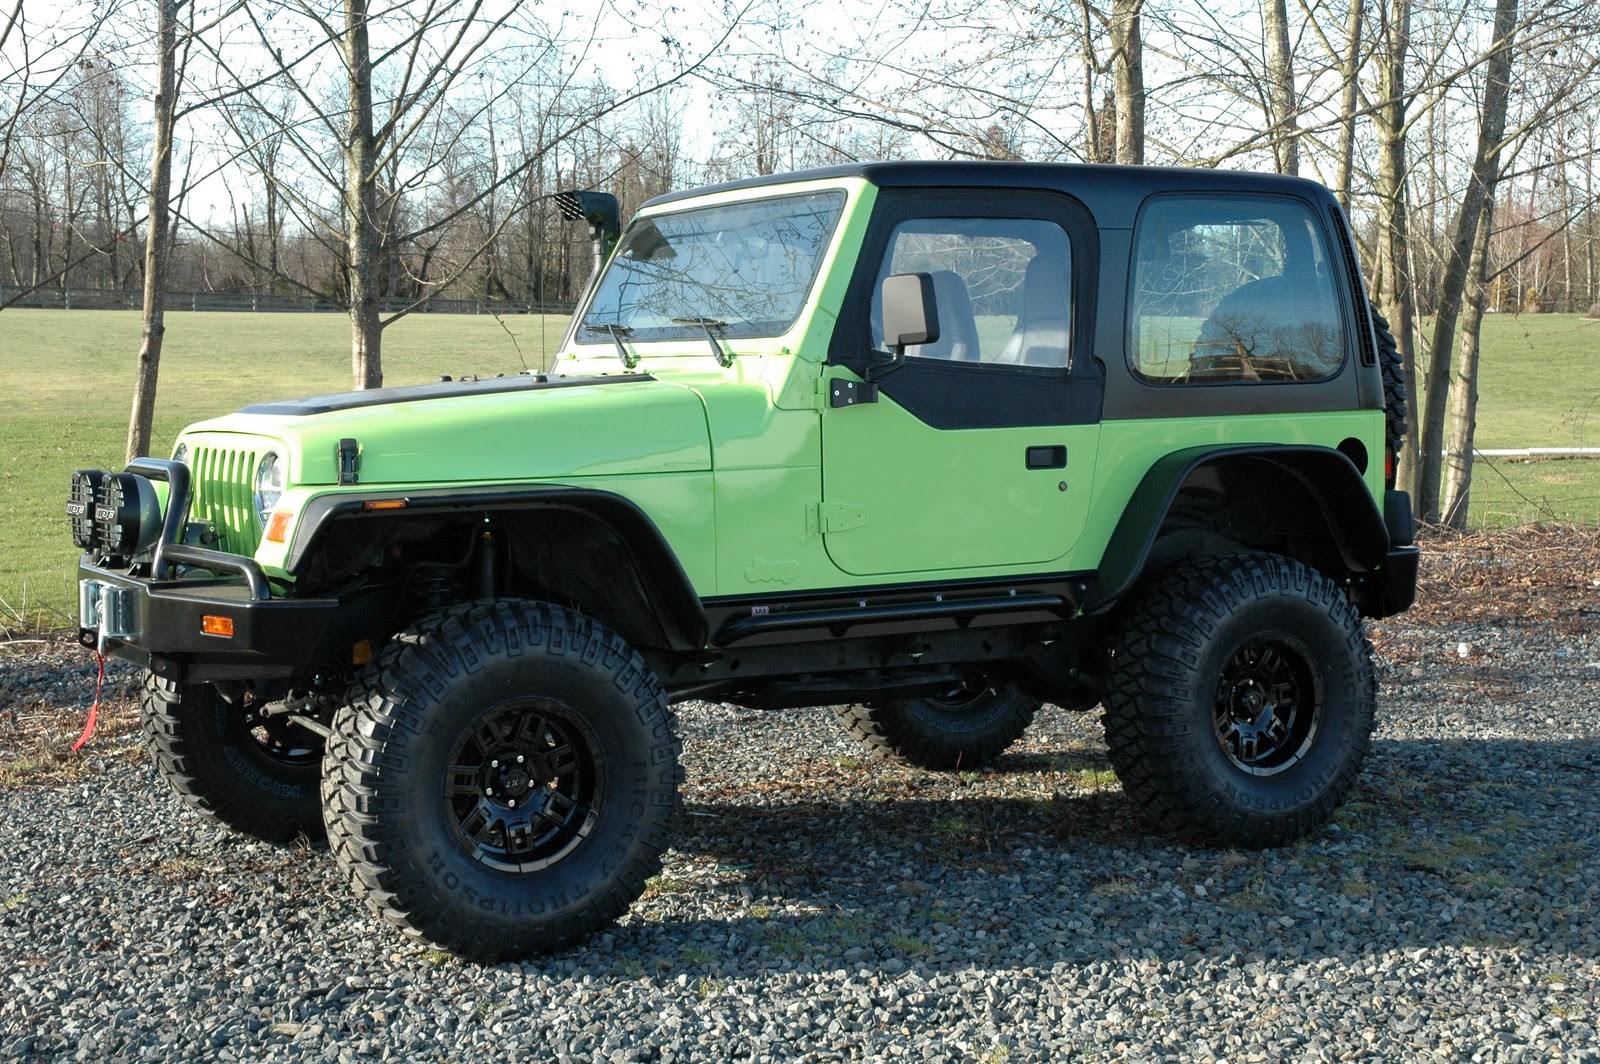

Check back shortly as we’re on a mission to finish up the Project

Some of the items to finish up our Cap-it/ARB Project are:


Monday, January 24, 2011

Phase VII - ARB Front & Rear Bumpers

So we’re finally going to install the Front and Rear ARB Bumpers on our Jeep.

ARB is world renown for their Air Lockers but when it comes to Bumpers they’re above the rest. The quality and engineering that go into them is second to none. ARB Bumpers are the only ones that are AIRBAG Certified on the market today. They are designed to be highly durable, lightweight and yet designed to absorb impact if the unmentionable happens.

The front bumper is pretty basic. Undo the 6 bolts holding the factory bumper, light up the new bumper up and bolt back on using all new hardware.

Seeing that we just installed a winch bumper, it be rude not to put a winch on.
For this we are going to be installing WARN’s latest hi-tech 9.5ti winch. This  powerhouse is a work of art, it has Thermo Integrated technology that let’s you know when the winch is close to overheating. This will reduce down time and wear and tear on the winch. It does this from a red LED light on the winch remote. COOL STUFF!

It’s pretty basic to install a winch, the only challenge was trying to get the winch inside the bumper. After shoe-horning the winch in from the side, it’s a really tight fit inside the mounting location. But it sure look great in there.


The Rear Bumper is a little more challenging.

Extra attention should be taken when reading the instructions. There are a lot of prep work and hidden clip-on-nuts that need to be attached before you mount the bumper on the frame. If you miss one, you’re going to be taking the whole bumper off to get at it.

Here you seen the nuts clipped onto the backside of the bumper

Now we have to insert the alignment bolt for the swing away spare tire carrier. This seemed to be very difficult as there is not a lot of room to get your finger in there.

As for the bumper brackets, they mount up to the factory slotted holes in the frame. The nuts have to be fed up through access holes and left loose to center the bumper.

After we loosely mount up the bumper on the brackets, we attach some of the bumper latches on.

Once the bumper is centered to the body, there are 2 holes in the middle of the bumper that need to be marked put for drilling. The bumper then has to be removed to drill out the 2 marked locations and an additional 2 to hold the back bracket in place.

Now we mount the bumper back on and drill 2 more additional holes up through the frame brackets and bumper mounts on each side.

As you can see there’s about 5 bolts and 2 more on top (hidden from view) which gives you 7 attached mount points for superior strength. This will be necessary to support the weight of the tire carrier & 35” spare and the additional use for HI-LIFT jacks to change flats and towing purposes.

After the bumper is lined up and bolted together, its time for the swing away carrier.
Insert the huge bolt supplied with some grease and snug it up. No too tight or it won’t swing free.

The lock out pin, hydraulic gas shock and latching mechanism with urethane guide can be attached.

There’s a cover plate that needs to be attached over the support guide on the bumper.

From here we attach the wheel studs to the mounting plate for our spare. There are several holes to allow for different size wheel patterns. We’re configuring ours for 5-on-4.5”. the mounting plate then has to be adjusted out to allow our spare tire to sit flat up against the carrier. You’ll be taking it on and off serval times to get the right fit.

With the full weight of everything we finally mount the 35” spare on and make sure it opens. Some minor adjustments with the alignment bolt on the carrier hinge, we make sure that it operates easy and latches up properly to the bumper.

Stay tuned for more as next week we install a Customer Carpet Headliner and repaint the Hardtop.

For more info on ARB Product visit www.arbusa.com and  http://www.cap-it.com/offroad.html

Tuesday, December 28, 2010

Phase VI - Off Road Gear!

Ahhhh……… the Christmas festivities are finally over. It’s time to get back to reality and have some fun in the shop with the Jeep build.

A few weeks back we picked up the Jeep from the Body Shop with our brand new look. So now the fun part starts in outfitting the Jeep with some Off-Road gear.

First we’re going to replace the original seal beam headlights lights with a pair of IPF 920H 7” round lens’s from ARB. The lens’s are Prism and Column Cut to produce a 15 degree rise in the outside edge light pattern to provided a better view of the road shoulder. The beauty of this new lens housing is that you can use a aftermarket H4 High/Low Bulb to get a brighter output to increase visibility. This simple upgrade is a must for all Jeep owners. They’re available in the 7” Round & 7” Rectangular for YJ’s, TJ’s and JK’s.


On the right is the original seal beam headlight and the new IPF light is on the left

We’re installing the IPF H4 130/170w bulbs in the new housing. This should really light things up.


Before
After

Now for some more exterior styling. We’re going to be installing BUSHWACKER’s latest Flat Fender Style Flares to give our Jeep an old school look. (97-06 TJ’s & Unlimited - #10920-07 and 07-10 JK 4dr - #10918-07) Click to download BUSHWACKER’s Flat Fender Special - Flat Fender Rebate
These flares do take some time to put on especially taking off the old originals. So as dumb as it sounds, be sure to read the instructions before install the flares or you’re going to be taking them on and off a few times.
The Flat Fender Flares are a direct bolt on in the factory holes. Bushwacker provides all the necessary hardware and trim in the kit, including a new LED signal light on the front flares. On our Jeep, most of the fasteners were corroded and simply broke off, so we had to improvise when installing the new flares.
The first thing you have to do is install the mounting brackets in the factory holes. The reason for this is for the flares to mount over the bracket to give a clean seamless install. There’s about 3 brackets per wheel well to be fitted.


As I mentioned earlier most of the factory flare hardware had to be removed due to being in rough shape. Here I had to reinstall some ¼” thread crush nuts back into the body to mount the flare brackets.


When mounted in you can see in the picture it’s a flush mount application.


Now that I’ve attached the body trim to the flare, I simply slide the flare over the bracket and screw them together. As you can see this will give us adequate tire coverage and also give is the Classic Jeep Flat Fender look on our modern TJ.


Since I’m working on the flares, I might as well put the ARB Rock Sliders (#4450010) and make sure they work with the new Flares.
I always wanted to install these sliders and to my surprise, they’re very easy to install. The protection and coverage the Rock Sliders give are unbelievable. A lot of time went into these when designing them.

As you can see ARB’s Rock Slider give you superior side coverage on the side and under the rocker panel for when your traversing over big boulders and stumps. They also provide brackets that mount on the inside of the rocker panel to give more strength and support for the rocker panel.


Wow!! We’re in luck.
Mind you there was a little persuading and massaging I had to do to get them to work but they just barely fit between the new flares I just installed.
What I had to do is take off the rear fender flare, hold the Rock Slider in place and then mount the fender flare back on. As you can see I had about a 3/16” of room to work with, but it worked.


Now that’s a tight fit!

Front


Rear


So I’ve got the slider in place and there’s 6 holes on the face of the rocker panel that need to be marked for drilling. Now I have to take off the rear flare in order to remove the rock slider to drill through the rocker panel.


Now that I’ve got the holes drilled out, I can now reinstall everything back together again and bolt the sliders up to the rocker panel with the support bracket on the backside for the added strength.


To secure the bottom, ARB supplies 3/16” pop rivets to fasten the bottom portion of the sliders to the bottom of the body. There’s about 14 pop rivets per slider.


Here’s the final look of the flares the rock sliders mounted together.


Stay tuned for more as we mount up the ARB Front & Rear Bumpers with the Swing away Tire Carrier.

Every you’ve seen today can be purchased through one of our 15 Locations throughout BC & Alberta or on Cap-it’s Online website
For more information about any other ARB Products, you can visit them at www.arbusa.com